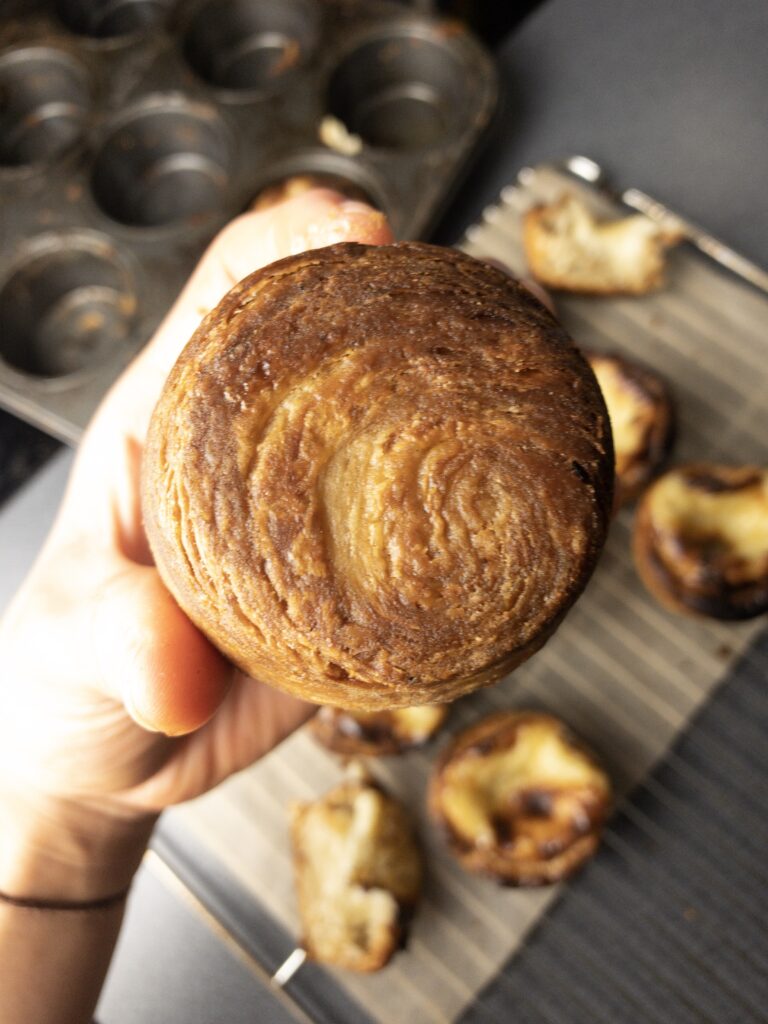
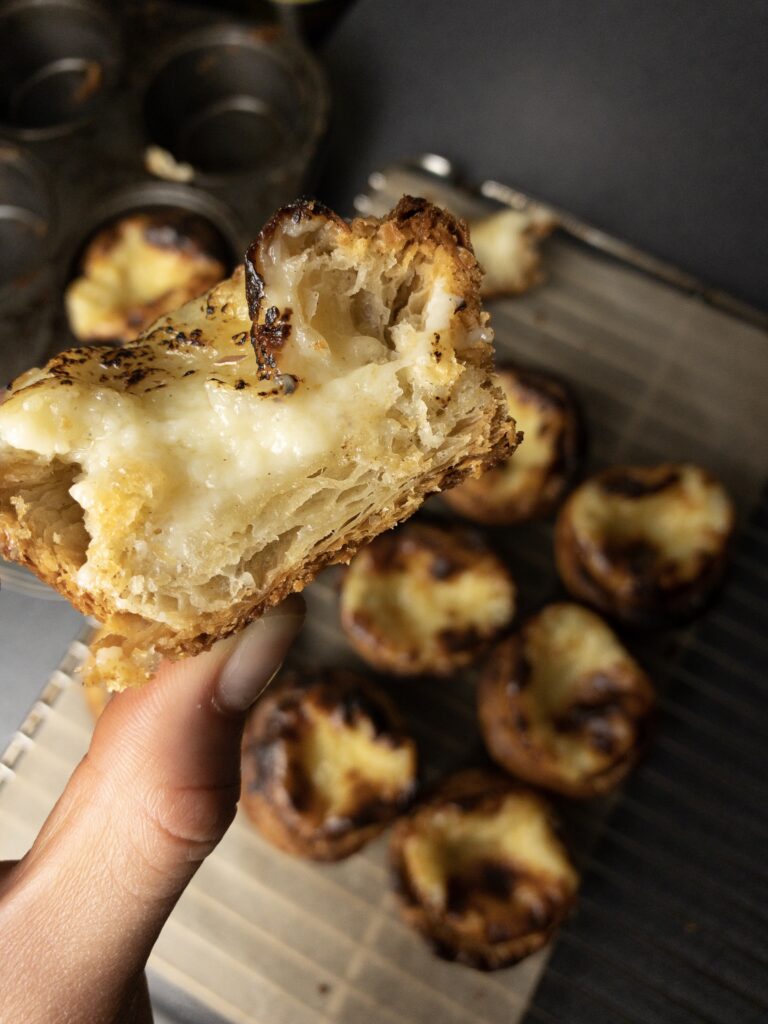
This Portugese Egg Tarts Recipe gets you the best that you can get outside of Portugal (my friends can vouch for this). Their flaky crusts, custardy centres and caramelised surfaces are what dreams are made of!

Pastéis de Nata are a traditional Portuguese pastry that can be best described as an egg tart. Back in 2015, my trip to Lisbon consisted of a daily intake of at least 5 of these glorious tarts – they were so simple, so incredibly delicious and so cheap! I had the pleasure of trying the insanely famous pastéis de nata from Fábrica de Pastéis de Belém and was absolutely blown away. When I came back to the UK, I realised that they costed at least £2 per tart, and weren’t even half as good as the ones in Lisbon. As always, the solution to this is to develop this Portugese egg tarts recipe so that I can make it any time for just a fraction of the price.
These take quite some work but definitely heaps easier than you might think. I will say though, do not be tempted to use store-bough pastry dough for this. The result might still be delicious but it won’t be nearly as impressive or authentic. Take it from a real lazy cook – make your own puff pastry, I PROMISE IT WILL BE WORTH IT.
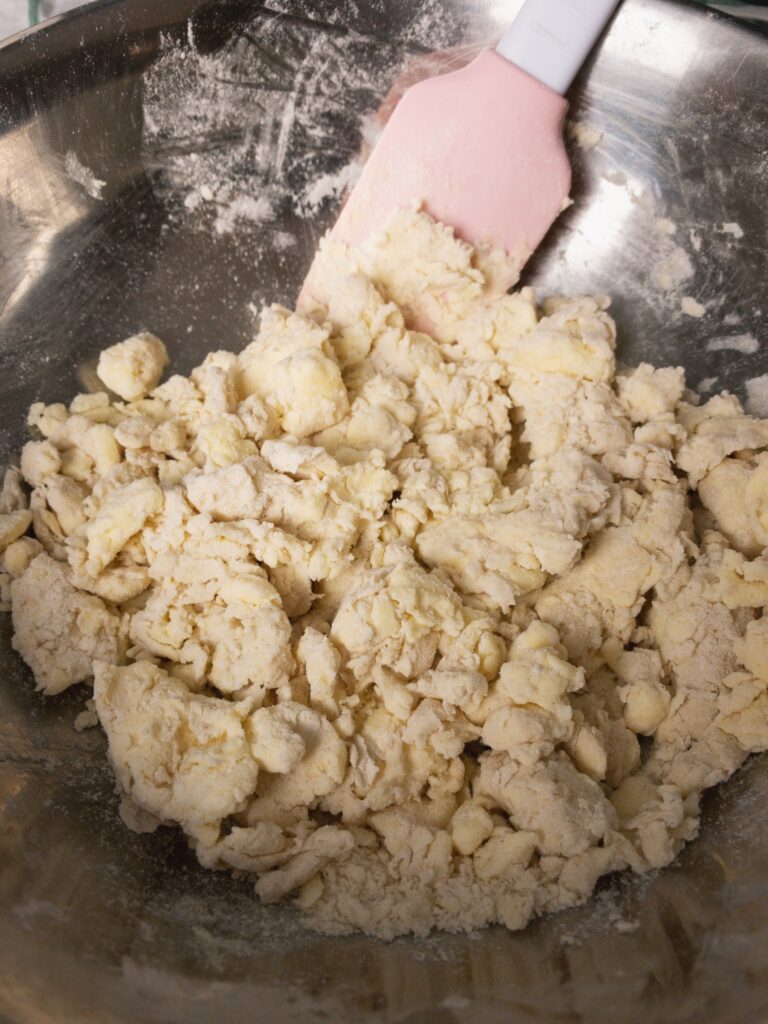
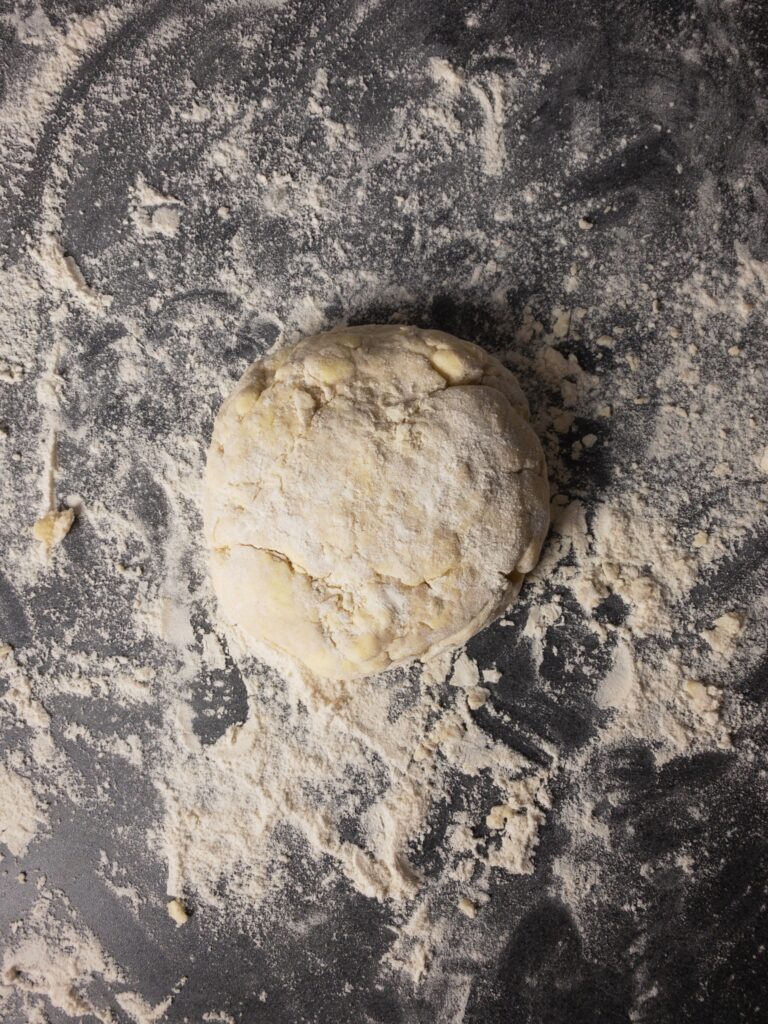

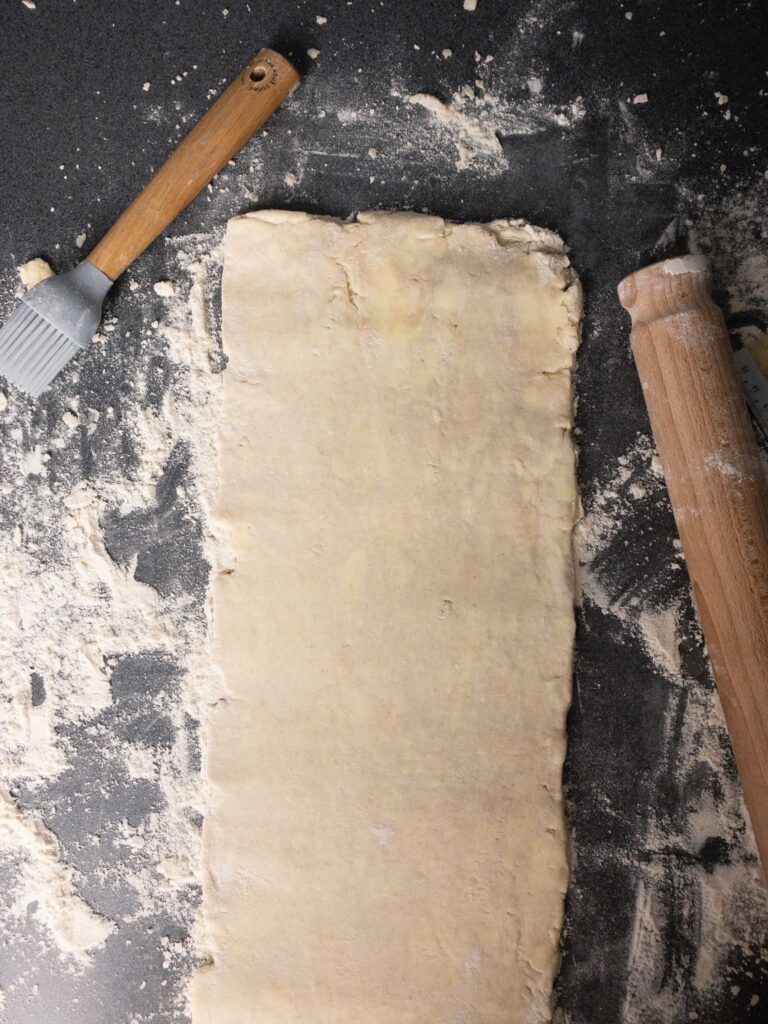
First 2: how the dough looks when combined initially. Last 2: notice the difference in butter dispersion when the dough is rolled out the first time compared to the second time.
This Portugese Egg Tarts Recipe gets you the best that you can get outside of Portugal (my friends can vouch for this). Their flaky crusts, custardy centres and caramelised surfaces are what dreams are made of! PUFF PASTRY: Preparing the ingredients - If using frozen butter, take it out of the thaw slightly while preparing the rest of the ingredients. Place your mixing bowl into the fridge for a few minutes to cool down. (Note 1) Puff pastry dough - Mix the flour and salt together in the mixing bowl. Using a hand grater, grate in the cold butter on top of the flour and salt - remember to work quickly so the butter stays cold. Add 6 tablespoons of iced water into the mixture, adding 1 tablespoon at a time and mixing with a spatula/spoon until the dough comes together before adding the next one. After 6 tablespoons, if you see excess flour in the bowl and the dough looks dry, add another tablespoon of iced water and mix. Use your hands and press the dough together and shape it into a rough disk - at this stage, the dough would be a little shaggy and streaky but that’s ok. Be careful not to overwork the dough. Immediately wrap the dough in cling film and chill it in the fridge for at least 30 minutes. Turn #1 - Generously flour your surface and rolling pin. After the dough has rested and chilled, transfer it to the floured surface (save the cling firm, you’ll be reusing it) and use the rolling pin to roll it out into a 15 x 38 cm (6 x 15 inch) rectangle. Use the rolling pin or your hands to push the dough inwards if the edges begin to crack. Try and keep your rectangle’s edges straight and not rounded - no need to be too obsessive on this, but neatness is quite important for uniform layers. Again, when rolling out the dough, work quickly so that it remains cool. Fold the bottom third of the dough over the middle third, and then fold the remaining third of the dough on top of that, brushing off excess flour in between each fold. Re-wrap the dough in the cling film you saved and chill in the fridge for at leat 30 minutes. Feel free to let it rest overnight. Turn #2 - Roll the dough out again into a 15 x 38 cm (6 x 15 inch) rectangle. Same as in Turn #1, fold the bottom third of the dough over the middle third, and then fold the remaining third of the dough on top of that, brushing off excess flour in between each fold. Rotate the dough 90° and repeat the same process (i.e. rolling out the dough again into a 15 x 38 cm rectangle and folding it into thirds). Brush off any loose flour, wrap it again in the cling film you used earlier, and chill in the fridge for another 30 minutes. Again, you can choose to let it rest overnight. Turn #3 (THE FINAL ONE) - Repeat the same process as in Turn #2, wrap and refrigerate. The pastry is ready to use 90 minutes after you last rolled it. You can also freeze the dough for up to a month as long as it is sealed tightly in plastic wrap. PASTRY SHELLS: Grease a 12-hole muffin tin and set aside. Roll out the puff pastry dough into a 25 x 30 cm (10 x 12 inch) rectangle. Roll the dough into a tight roll until you have a 30 cm (12 inch) long roll. Return the pastry to the freezer for 30 minutes to chill until firm. Cut the chilled pastry into 12 equal disks - cut the pastry in half twice, and then cut each of the remaining 4 pieces into 3 equal pieces to get a total of 12 OR use a ruler. Start with 6 pieces first, and put the remainder back in the freezer to keep them chilled. On a floured surface, place each piece of dough so the swirls in the dough are facing up. Use a rolling pin to roll each piece into a flat disc, just slightly wider than the diameter of each mould (use flour sparingly when rolling out the discs). Lift the discs and place them above each mould. Prepare a bowl of water - wet your fingers before touching the dough. Gently press the dough into the mould and use your thumb to push down into the middle, flattening it out. Once you’ve achieved a shallow bowl shape, use your fingers (I recommend your thumbs or index fingers) to draw and stretch the dough up the sides of the tin such that it creates a cup. Be careful not to stretch the dough too thin, the base in particular, otherwise it’s not going to hold your custard. That said, make sure the dough at the bottom is not too thick either. Pop the muffin tin into the freezer while you roll out the remaining 6 pieces that have been chilling in the fridge. Take the muffin tin out when you’re ready and repeat step 5. CUSTARD: In a large bowl, whisk the plain flour and 40ml of milk until smooth and set aside In a medium pot over low heat, add in the water, sugar and cinnamon stick (don’t stir) and let it bubble away until it reads 100°C on the thermometer. Meanwhile, in a smaller pot, heat up the remaining 160ml of milk over the hob and take it off once it starts to simmer. The milk will boil faster than the sugar mixture will get to 100°C so keep your eye on both of them. Once the milk is ready, pour it over the flour/milk mixture and add in the vanilla paste. Whisk until combined. When the sugar solution gets to 100°C (or until the solution is completely clear and the sugar has dissolved), remove the cinnamon stick with a pair of kitchen tongs or chopsticks (be careful, it’s VERY hot). Pour it into the flour/milk mixture gradually, whisking all the time. Continue whisking the mixture for approximately 10 minutes until it cools slightly - it should still be warm to the touch. Add the egg yolks in and whisk until well combined. Pass the mixture through a sieve and set aside (Note 2). ASSEMBLY: Preheat the oven to 230°C. Pour the cooled custard into each shell until about 3/4 full. Work quickly since you don’t want to give the custard any chance of soaking into the pastry. It’s important to have the oven ready to go once you start pouring custard into the shells. Bake for 30 minutes, but check them after 20 minutes and rotate the muffin tin if they are browning unevenly. If the pastry looks like it is browning too quickly, you may want to turn the heat off and let the residual heat finish the baking process. Once baking is complete, remove the pastéis de nata from the oven (leaving them in the moulds) and let cool. They will smell incredible at this point but I urge you to resist and wait until they cool down because the custard will be extremely hot. Once they are cool, just remove them from the muffin moulds and enjoy warm! Dust them with cinnamon if you wish. To reheat these tarts, preheat the oven to 175°C and heat them for 7-10 minutes until warmed through. 1. When making puff pastry, it’s really REALLY important to keep the ingredients cold, especially the butter - obviously this means working as quickly and handling it as little as you can. Keeping the butter cold ensures that the flour and butter do not meld together. This separation creates the lamination (aka layers) in puff pastry.
Portugese Egg Tarts (Pastéis De Nata)
 (3 votes, average: 5.00 out of 5)
![]() Loading...
Loading...Ingredients
Instructions
Notes
2. The custard keeps for about a week in the fridge as long as it’s stored in an air-tight container.

Let me know what you think of this Portugese Egg Tarts Recipe in the the comment box below!